Cleaning & Care
How to Remove Bathroom Mold and Mildew Safely
Learn how to remove bathroom mold and mildew from tile, grout, ceilings, and caulk—plus when to call a pro for black mold in the shower.
Bathroom mold is one of the most common home maintenance problems, and most cases are completely fixable with the right cleaner, a bit of dwell time, and some elbow grease. Here's how to remove bathroom mold and mildew from every surface, identify when a situation has become a health hazard, and keep it from coming back.
What You're Actually Dealing With
Mold and mildew are both fungi, but they behave differently. Mildew sits on the surface, typically looks powdery or flat gray, and wipes away without much fuss. Mold grows deeper into porous materials, ranges in color from white to green to black, and can return quickly if you don't address the moisture that feeds it.
The humid conditions in a bathroom, warm air, standing water, minimal airflow, create ideal conditions for both. Grout joints, silicone caulk seams, ceiling corners, and the back edge of the tub are the usual hotspots. Start in those places.
A note on "black mold": Not all black-colored mold is the notorious Stachybotrys chartarum (toxic black mold). The term gets thrown around loosely. True toxic black mold has a distinctive slimy texture and a musty, earthy smell that doesn't go away. But since you can't visually tell the difference with certainty, anything covering more than 10 square feet, growing inside walls, or appearing in your HVAC system should be handled by a licensed mold remediation professional, not a weekend project.
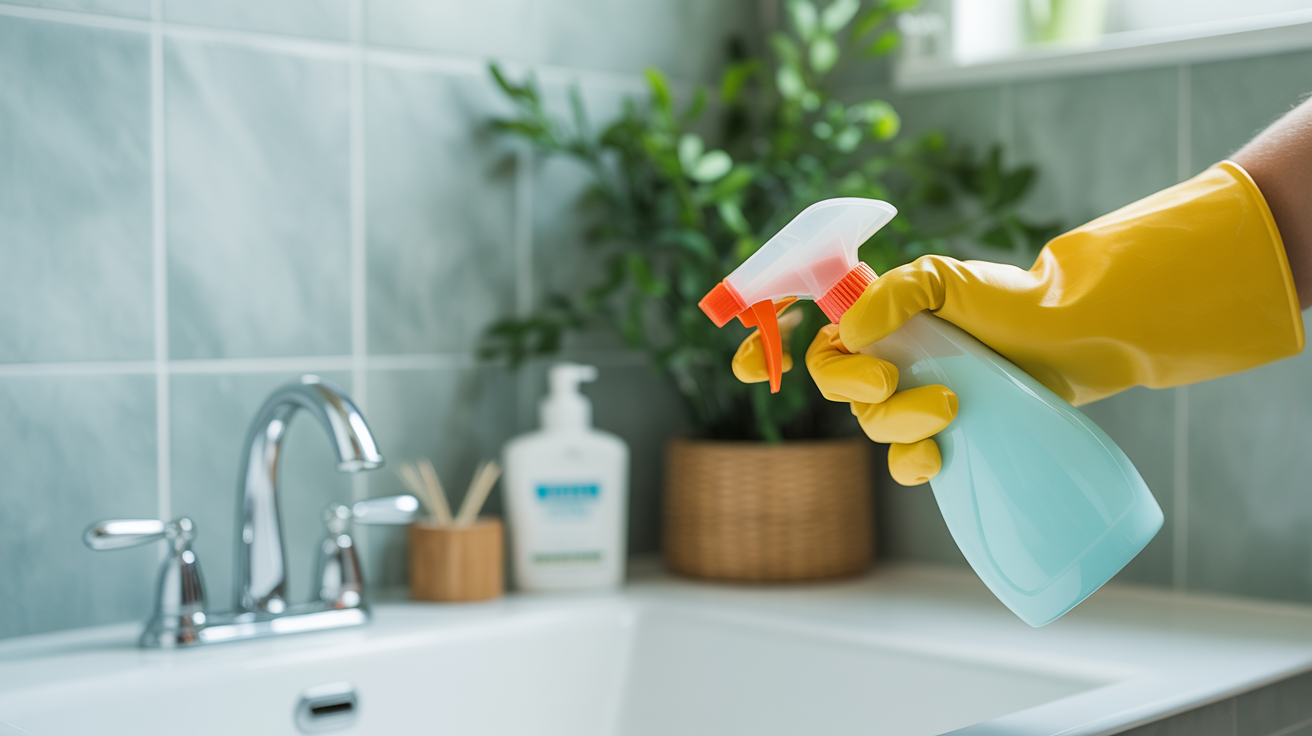
Safety First: Ventilate and Protect Yourself
Before you open any cleaning product, set up the space correctly.
- Open windows and run the exhaust fan.
- Wear rubber or nitrile gloves and a mask rated N95 or better. A paper dust mask won't filter mold spores.
- Wear old clothes or a disposable coverall, bleach ruins fabric instantly.
- Never mix bleach with ammonia or any ammonia-based cleaner. The resulting chloramine gas is toxic. Check your cleaner labels.
If you're sensitive to mold or have asthma, consider doing the scrubbing in short bursts and leaving the room to breathe between them.
How to Remove Mold from Tile and Grout
Tile surfaces are the easiest to clean because the face of the tile is non-porous. The grout between tiles is a different story, it's a cement-based material that mold can penetrate.
Step-by-Step for Tile Surfaces
- Rinse the area with warm water to loosen surface debris.
- Apply your cleaner directly to the moldy tile and let it sit, dwell time does most of the work.
- Scrub with a stiff-bristle brush (an old toothbrush for grout lines). Work in small sections.
- Rinse thoroughly and repeat if any discoloration remains.
- Dry the surface with a clean cloth. Leaving it wet invites regrowth.
Cleaner Options and Dwell Times
| Cleaner | Best For | Dwell Time | Notes |
|---|---|---|---|
| Diluted bleach (1 part bleach : 10 parts water) | White or light grout, ceramic tile | 10–15 min | Ventilate well; don't use on colored grout |
| Hydrogen peroxide (3%) | Colored tile, natural stone | 10 min | Safer on stone than bleach |
| White vinegar (undiluted) | Light mildew, routine maintenance | 30–60 min | Weaker on heavy mold; don't use on natural stone |
| Commercial mold/mildew spray | General use | Per label (usually 5–10 min) | Many contain sodium hypochlorite |
| Baking soda paste | Scrubbing aid, deodorizer | Apply and scrub immediately | Works well combined with vinegar or peroxide |
For grout that's stained rather than just moldy on the surface, a paste of baking soda and hydrogen peroxide applied directly to the line, left for 10 minutes, then scrubbed usually lifts embedded discoloration. See our guide to keeping grout clean and white for ongoing maintenance tips.
Mildew on the Bathroom Ceiling
Ceiling mold is one of the trickier spots because you're working overhead and the surface is often painted drywall, not tile. The approach is a bit different.
Step-by-Step for Ceilings
- Protect the floor with a drop cloth or old towels.
- Wear your mask and eye protection, you don't want cleaner or spores dripping onto your face.
- Mix a diluted bleach solution (1 cup bleach per gallon of water) in a spray bottle or bucket. For painted drywall, hydrogen peroxide is a gentler alternative that's less likely to damage the finish.
- Apply the solution with a sponge or spray bottle. Don't saturate the drywall, too much moisture causes more damage.
- Let it dwell for 10 minutes, then wipe gently with a clean cloth.
- Let the area dry completely before painting or applying any sealant.
If the mold has penetrated into the drywall itself, meaning the surface stays discolored after scrubbing, or the drywall feels soft, the affected panel needs to be cut out and replaced. Painting over mold without removing it only hides the problem temporarily.
When ceiling mold means a bigger issue: Recurring mold on bathroom ceiling despite cleaning usually signals inadequate ventilation or a roof/plumbing leak. Run the exhaust fan during and for 20 minutes after every shower, and check that it actually exhausts to the outside (not just into the attic).
Removing Mold from Silicone Caulk
The silicone bead along the tub-to-wall seam and around the shower base is where mold seems almost indestructible. Silicone is non-porous, but mold grows in the tiny surface imperfections and inside any cracks in the caulk.
When to Clean vs. When to Replace
If the caulk is intact and the mold is surface-level, cleaning can work. If the caulk is cracked, peeling, or has mold that doesn't respond to bleach after two rounds of treatment, replacement is the right call. New caulk is inexpensive and the job takes about an hour.
Step-by-Step for Caulk
- Apply diluted bleach or a gel mold remover directly to the caulk and let it sit for 15–20 minutes. Gel formulations stay in contact with vertical surfaces better than liquids.
- Scrub with an old toothbrush and rinse.
- Repeat once if needed. Deep-set mold in caulk often takes two passes.
- If replacing: Score the old caulk with a utility knife, pull it out, clean the bare joint with rubbing alcohol, let it dry fully (at least an hour), and apply fresh mold-resistant silicone caulk.
Our glass shower door cleaning guide at /posts/how-to-clean-glass-shower-doors-and-keep-them-spotless covers the caulk and frame seals along the door track, which are just as prone to buildup.
When to Call a Professional
Most bathroom mold jobs are DIY-appropriate. Call a licensed mold remediation contractor if:
- The affected area is larger than 10 square feet (roughly a 3-by-3-foot patch).
- Mold is growing inside wall cavities, under flooring, or in the HVAC system.
- Someone in the household has respiratory problems or a compromised immune system and the mold keeps returning.
- The mold has a slimy texture and a persistent musty odor even after cleaning, this pattern is more consistent with Stachybotrys than common bathroom mold.
- You suspect a plumbing leak or structural water intrusion is the source.
Professionals have containment equipment, HEPA air scrubbers, and the ability to test mold species. A consultation is often free or low-cost and can confirm whether you need remediation or just better ventilation.
Preventing Mold from Coming Back
Cleaning mold without fixing the underlying moisture problem is just delaying the next round.
- Run the exhaust fan every shower and for 20 minutes afterward. If yours sounds weak or old, replace it, bathroom fans are cheap and a weekend install.
- Squeegee tile walls after showering. This takes 30 seconds and removes most of the moisture mold needs.
- Leave the shower door or curtain open after use so air can circulate.
- Re-caulk every 2–3 years, or whenever you see cracking. Fresh, intact caulk leaves nowhere for mold to hide.
- Check the grout annually. Sealed grout resists moisture better; apply a penetrating grout sealer after a deep clean.
- Fix drips and leaks promptly. A slow faucet drip or a running toilet keeps the room more humid than it needs to be.
Hard water mineral deposits can hold moisture against tile and grout and provide a surface mold likes to colonize. If you notice a white or tan crust around fixtures, that's worth addressing, the guide to removing hard water stains in the bathroom walks through the process.
Frequently Asked Questions
How do I know if bathroom mold is dangerous?
Most bathroom mold, the gray-black discoloration in grout lines or the fuzzy growth on a ceiling corner, is not the toxic variety. It's still worth removing because it can aggravate allergies and asthma. Signs that warrant more caution: large patches (over 10 sq ft), mold that keeps coming back quickly despite cleaning, a slimy texture, or a musty smell that won't go away. If in doubt, call a mold inspector.
Can I use vinegar instead of bleach to remove bathroom mold?
Yes, especially on colored grout or natural stone where bleach could cause damage. Undiluted white vinegar kills many common mold species. Its weakness is penetration, bleach is better at killing mold that's embedded into porous grout. For heavy infestations, bleach (diluted 1:10 with water) is more effective, used with good ventilation.
Why does mold keep coming back in the same spot?
Recurring mold almost always points to a moisture source that isn't being addressed. Common culprits: an exhaust fan that's too weak or vents into the attic instead of outside, cracked or failing caulk that traps water, a slow plumbing leak inside the wall, or a shower that isn't being dried after use. Fix the moisture source, and the mold stops returning.
Is black mold in the shower automatically dangerous?
No. Many common mold types appear black or very dark. True Stachybotrys (toxic black mold) is relatively rare, prefers very wet cellulose materials like drywall and wood, and is slimy rather than powdery. That said, any mold in the shower should be removed, and large or unusual infestations are worth having tested if you're concerned.
How long does it take to remove bathroom mold?
A typical mold-cleaning session, tile, grout, caulk, ceiling, takes 1 to 2 hours with proper cleaner dwell times. Replacing caulk adds another hour for removal and drying before the new bead goes on. Full DIY ceiling treatment including drying and repainting can stretch across a weekend if the surface needs a coat of mold-blocking primer.