Renovations
How to Plan a Bathroom Remodel Step by Step
A practical bathroom remodel planning guide covering scope, budget, permits, trade sequencing, and the decisions that derail most projects.
Good bathroom remodel planning happens before a single tile is ordered. Get this part right and the rest is logistics. Get it wrong and you're making expensive decisions under pressure with a gut-out sitting open.
This guide walks through every planning stage in order, from measuring the room to signing off with your inspector.
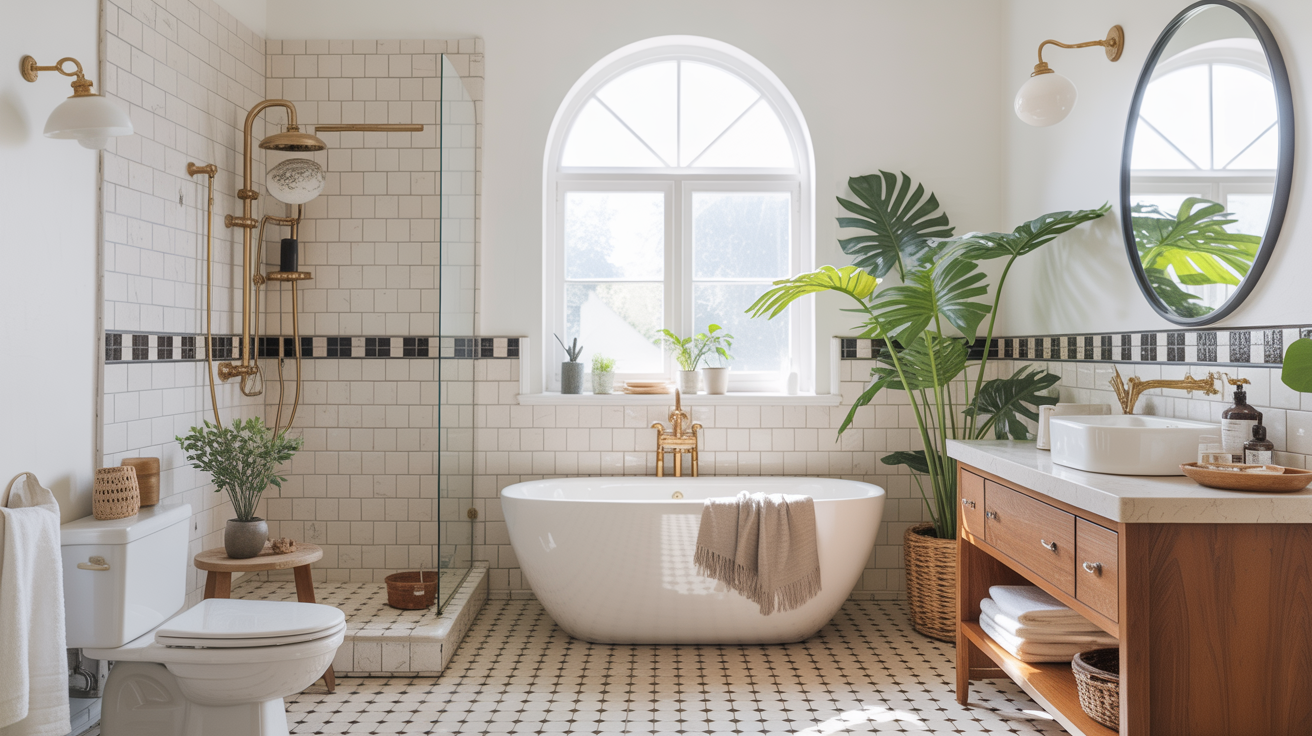
Start With Scope: What Are You Actually Changing?
The first thing to decide isn't budget or style. It's scope. Every other decision cascades from this one, and vague scope is how projects balloon.
There are three meaningfully different scope levels:
| Scope Level | What It Covers | Typical Timeframe | Rough Cost Range |
|---|---|---|---|
| Cosmetic refresh | New fixtures, paint, accessories, maybe a vanity swap | 1-2 weeks DIY | $1,000-$5,000 |
| Mid-range remodel | New tile, tub/shower replacement, updated lighting and plumbing fixtures, possibly layout-neutral | 3-6 weeks with contractors | $8,000-$20,000 |
| Full gut remodel | Down to studs, possible layout changes, new subfloor, all new plumbing and electrical rough-in | 6-12 weeks | $20,000-$50,000+ |
Layout changes are the scope multiplier nobody warns you about. Moving a toilet 12 inches costs roughly the same as moving it 4 feet because you're still cutting concrete or jacking up subfloor, rerouting the drain stack, and potentially touching the vent stack. If you can design around keeping fixtures in their existing footprint, you will save weeks and thousands.
Measure Everything Before You Touch a Catalog
Pull a tape measure before you open a single showroom tab. You need:
- Room dimensions floor-to-ceiling, wall to wall
- Door and window rough openings, including swing direction
- Existing fixture centerlines (toilet flange, tub drain, vanity supply lines)
- Clearances: toilet needs 15 in. minimum from center to any side wall (18 in. is the comfortable standard); a 60 × 32 in. shower is code minimum but feels cramped, 36 × 36 in. is workable, 36 × 60 in. is comfortable
Photograph everything with a tape in frame. You'll reference these shots dozens of times.
Budget: Set It Before You Fall in Love With Anything
Bathroom remodel planning without a locked budget is interior design cosplay. The budget shapes every product decision, so set it first.
A useful rule of thumb: a mid-range bathroom remodel in most U.S. markets runs $150-$300 per square foot for labor and materials combined. A 50 sq. ft. bathroom sits at $7,500-$15,000 for a real remodel with licensed trades. For detailed cost breakdowns by scope and region, see our guide on how much a bathroom remodel costs in 2026.
Where the Money Actually Goes
People underestimate labor. Tile work alone typically runs $15-$40 per square foot installed, and a shower enclosure with niches and a built-in bench can easily hit 60+ square feet of tile surface once you count three walls, the floor, and any curb. Budget rough numbers:
- Demo and disposal: $500-$2,000
- Rough plumbing (if moving anything): $1,500-$5,000
- Rough electrical (GFCI, exhaust fan, lighting circuit): $800-$3,000
- Tile labor and materials: $2,500-$10,000+
- Vanity, toilet, faucets, shower fixtures: $1,000-$8,000+ depending on what you pick
- General contractor overhead and profit: typically 15-25% on top of subs
Hold 15% of your total budget in contingency. Hidden water damage, out-of-plumb walls, and mid-project code discoveries are routine, not rare.
Permits and Code: Don't Skip This Section
If you're changing layout, adding an exhaust fan circuit, or moving any plumbing, you almost certainly need a permit. The jurisdiction matters: some cities require permits even for vanity replacements if you touch the supply lines.
Why permits matter for a remodel (beyond legality): unpermitted plumbing and electrical work can void homeowner's insurance claims and complicate a home sale. It's not worth it.
Call your local building department before you finalize plans. Ask specifically about:
- What triggers a permit in your municipality
- Whether your project requires architectural drawings or just a site plan
- Inspection stages (rough-in inspection before you close walls is standard)
- Current permit processing times (some jurisdictions run 4-8 weeks for review)
For anything structural, electrical, or plumbing-related, consult a licensed professional. Local codes vary significantly and your contractor should be pulling permits, not you.
Selecting Materials: Make All Decisions Before Demo Day
This is where most projects go sideways. You don't want to be picking grout color while a tile setter is on the clock.
The Decision Sequence
Work through selections in this order, because each one constrains the next:
- Shower/tub unit or custom tile layout, this sets your plumbing fixture rough-in locations
- Flooring tile, choose before vanity to make sure the vanity legs or base works with tile thickness
- Wall tile, coordinate grout lines with floor tile if they meet at a threshold
- Vanity and sink, confirm depth fits the room (standard is 21-22 in. depth; 18 in. works in tight spaces)
- Toilet, rough-in distance matters: measure from finished wall to flange center; most toilets are 12 in. rough-in, some older homes are 10 or 14 in.
- Fixtures and faucets, match finish across all metal in the room (chrome, brushed nickel, matte black) for visual cohesion
- Lighting, specify bulb color temperature (2700-3000K is warm and flattering; avoid 5000K daylight in bathrooms)
- Paint and accessories, last because they're easy to change
Order materials early. Tile lead times from specialty suppliers can run 4-8 weeks. Vanities in popular sizes go out of stock. If something arrives damaged, you need time to reorder.
The Remodel Order of Operations
This is the sequence licensed contractors follow. If you're managing your own subs, hiring out of order creates expensive rework. For a deeper look at what happens week by week, see our bathroom remodel timeline guide.
- Demo, strip everything to studs (or to the scope boundary)
- Rough plumbing, drain lines, supply lines, any relocated vents; pass rough inspection before closing walls
- Rough electrical, new circuits, fan wiring, GFCI outlets; also inspected before closing walls
- Blocking and backer, add blocking for grab bars and accessories now, even if you're not installing them yet; cement board or waterproof backer on wet walls
- Waterproofing, shower pan liner or membrane system before any tile; this step is non-negotiable and often underdone on DIY projects
- Drywall and greenboard, close walls on dry areas; use moisture-resistant drywall in humidity zones
- Tile, floor first, then walls; let floor cure before heavy foot traffic
- Paint, after tile, before fixtures
- Vanity, toilet, shower fixtures, finish plumbing trim-out
- Electrical finish, install exhaust fan, lights, outlets
- Accessories and mirrors, final punch list
- Final inspection, required if permitted; don't skip it
If you're wondering which pieces you can safely take on yourself versus what truly needs a licensed trade, our DIY bathroom remodel guide breaks it down by task.
Your Bathroom Renovation Checklist
Print this and check things off as you go. Nothing should be ordered or contracted without the prior steps complete.
Planning phase
- Scope defined (cosmetic / mid-range / gut)
- Room measured with photos
- Budget set with 15% contingency
- Permit requirements confirmed with local building department
- Contractor bids received (minimum 3 bids for jobs over $5,000)
- Contracts signed with payment schedule tied to milestones, not dates
Before demo
- All materials ordered (tile, vanity, fixtures, toilet, lighting)
- Lead times confirmed; delivery dates on calendar
- Temporary bathroom access arranged if this is your only bathroom
- Dumpster or haul-away scheduled
During construction
- Rough-in inspections passed before walls close
- Waterproofing installed and confirmed before tile
- Grout color approved on a sample before full install
Closeout
- Final inspection passed
- All fixture and appliance warranties documented
- Paint color and tile info saved for future repairs
Frequently Asked Questions
How long does bathroom remodel planning take before you start construction?
For a mid-range remodel, budget 4-8 weeks of planning before you break anything. That covers getting contractor bids, waiting on permit approval, ordering materials, and letting lead times resolve. Rushing this phase almost always extends the construction phase.
Do I need an architect or designer to plan a bathroom remodel?
For a cosmetic refresh or like-for-like replacement, no. For a layout change, complex tile work, or a primary bath remodel over $25,000, a bathroom designer (look for a certified NKBA member) typically pays for themselves in avoided mistakes and better product sourcing. A structural engineer is required if you're touching load-bearing walls.
What's the most common planning mistake homeowners make?
Picking products before locking the budget, then discovering the tile they love costs $28/sq. ft. when the budget needs $8/sq. ft. tile. Set the budget, then shop within it. The second most common mistake is underestimating lead times and scheduling a contractor before materials are confirmed in stock.
Can I live in my house during a bathroom remodel?
Usually yes, with caveats. If it's a second bathroom, no disruption. If it's your only bathroom, you need a plan: a gym membership, a neighbor's shower, or a portable toilet. Most contractors will tell you the rough-in phase (days 3-7 of a standard remodel) is when access is completely gone.
How do I get accurate contractor bids?
Provide a written scope of work to every bidder, the same document. Include floor plan dimensions, a materials list with specific product SKUs or model numbers, and photos. Bids against vague scopes are incomparable because each contractor fills gaps differently. Ask each bidder to break out labor and materials separately so you can see where the numbers actually differ.