Tile & Flooring
How to Seal Grout and Why It Matters
Learn how to seal grout properly, which grout sealer to choose, and how often to reapply to keep shower and floor tiles looking clean.
Sealing grout is one of those tasks that takes less than an hour and saves you from problems that take days to fix. Unsealed grout absorbs water, soap scum, and mold spores. Over time, the joints darken, stain permanently, and eventually crack. A grout sealer closes those tiny pores before any of that has a chance to happen.
This guide covers why sealing matters, which sealer type fits your tile situation, and a clear step-by-step process for applying it correctly.
Why Grout Needs Sealing
What Grout Is Actually Made Of
Standard cement-based grout is a mix of Portland cement, sand, and pigment. Cement is inherently porous. Under a microscope, it looks a bit like a sponge, full of capillary channels that pull in whatever liquid touches the surface. That structure is great for bond strength but terrible for moisture resistance.
Epoxy grout is different. It cures as a solid resin and has almost no porosity, so it does not need a sealer. But epoxy grout is harder to work with, more expensive, and far less common in residential bathrooms. If you have standard sanded or unsanded cement grout (which describes the vast majority of tiled bathrooms), sealing is not optional.
What Happens Without a Sealer
In a shower, unsealed grout faces hot water, soap residue, and high humidity every single day. The surface stays damp long after the shower ends, and mold spores find those wet cement pores an easy place to take hold. Black mold on grout lines is not just a cosmetic issue. It signals ongoing moisture penetration that can work its way into the substrate behind the tile.
On bathroom floors, the threat is different. Foot traffic grinds in dirt, and cleaning products leave mineral deposits. Both darken grout that was once bright white. Once cement grout is stained at a deep level, removing the stain usually means re-grouting rather than scrubbing.
Types of Grout Sealer
There are two main categories, and choosing the right one depends on where the tile is and how much foot or splash traffic it sees.
Penetrating (Impregnating) Sealers
These are the most common choice for bathroom tile. A penetrating sealer soaks into the grout and fills the capillary pores with a hydrophobic compound, usually silicone or fluoropolymer. The surface still looks exactly the same. Water beads up and rolls off rather than absorbing.
Penetrating sealers work well for both floor grout and shower grout. They hold up to moisture without creating a surface film that can peel or trap water underneath. Most need reapplication every 1 to 3 years depending on traffic and cleaning habits.
Membrane-Forming (Topical) Sealers
Topical sealers coat the surface of the grout with a thin layer of acrylic or polyurethane. They can give a glossy or color-enhancing finish, which some people prefer on decorative tile. The trade-off is durability. Surface coatings wear off, especially on floors, and a partially worn coating can trap moisture between the sealant layer and the grout underneath.
For shower walls and most bathroom floors, a penetrating sealer is the better default. Topical sealers are a reasonable choice for backsplashes or low-traffic decorative tile where the finish effect matters and wear is minimal.
How to Seal Grout Step by Step
What You'll Need
- Penetrating grout sealer (one bottle covers roughly 100 to 150 sq ft of tile)
- Small foam applicator brush or sealer applicator bottle with a roller tip
- Clean cloths or paper towels
- Mild tile cleaner or pH-neutral soap
- Grout brush or old toothbrush
- Painter's tape (optional, for protecting tile surfaces)
Clean and Prep the Grout
New grout needs to cure fully before you apply any sealer. Most grout manufacturers recommend waiting 48 to 72 hours after installation. Some products ask for a full 7 days. Check the grout packaging and follow the longer recommendation if you are unsure.
For existing grout, clean the joints thoroughly before sealing. Any dirt, soap scum, or mold sealed under the protective layer will stay there permanently. Scrub the grout lines with a stiff brush and a diluted tile cleaner, then rinse the surface completely. Let everything dry for at least 24 hours. Grout sealer bonds poorly to damp surfaces, and trapping moisture is the most common cause of sealer failure.
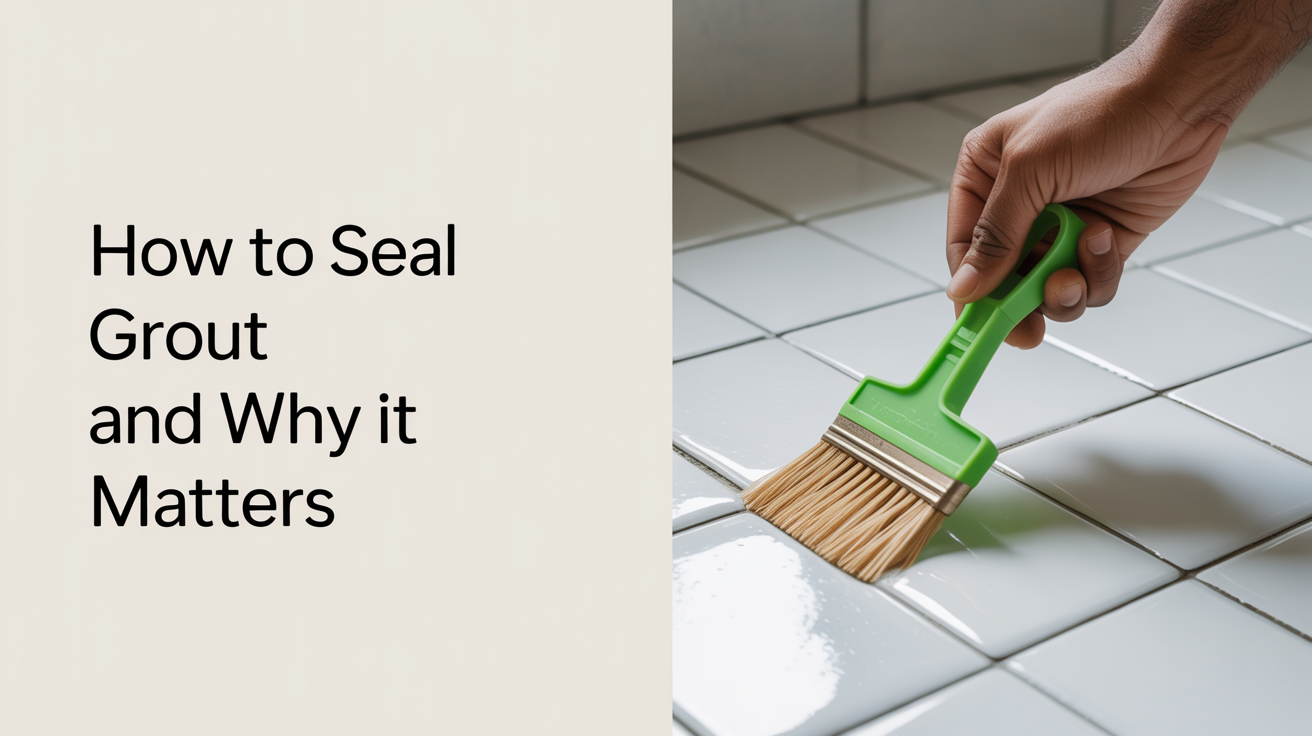
Apply the Sealer
Pour or dispense the sealer directly onto the grout line rather than spreading it broadly across tile. A roller-tip applicator bottle is the easiest tool for floor grout because you can run it along each joint without flooding the tile. For wall tile in a shower, a small foam brush gives you more control.
Work in sections of about 2 to 3 square feet at a time. Apply the sealer and let it sit for 5 to 10 minutes. Do not let it dry completely on the tile surface before wiping. Buff away any excess from the tile face with a clean cloth. Sealer haze on glazed tile is removable while wet but becomes a nuisance once it cures.
Second Coat and Cure Time
Most penetrating sealers benefit from a second coat, especially on porous or older grout. Apply the second coat 5 to 10 minutes after wiping the first one. Follow the same process: apply, wait, wipe.
Full cure time varies by product, but most penetrating sealers reach working strength within 24 hours. Avoid wetting the surface during that window. For shower tile, that means waiting a full day before using the shower.
After curing, do a simple water bead test. Splash a small amount of water on the sealed grout. If it beads up and sits on the surface, the sealer is working. If the water absorbs immediately and darkens the grout, the joints may need an additional coat or the grout is too degraded to seal effectively.
How Often to Re-seal Grout
Location matters more than calendar date.
Shower grout faces the harshest conditions: daily water exposure, steam, and cleaning products. Plan to re-seal every 12 to 18 months for grout in a regularly used shower.
Bathroom floor grout gets foot traffic, cleaning products, and occasional splashing. Re-sealing every 2 years is a reasonable baseline, but a high-traffic family bathroom may need it annually.
Vanity backsplash grout has a much easier life. Reapplication every 3 years is usually sufficient.
The water bead test is the most reliable signal. Run it every 6 months rather than waiting for visible staining. Catching a degraded sealer before discoloration sets in is far easier than trying to reverse it. If your grout has already stained deeply, look at the options for cleaning or restoring it before sealing over the damage.
For more detail on choosing tile that holds up in these environments, the guide on how to choose bathroom floor tile that lasts covers material and finish considerations that affect how much maintenance you're signing up for. And if you're tiling a shower from scratch, how to tile a shower wall: a step-by-step guide explains when in the process sealing fits relative to the rest of the installation.
Frequently Asked Questions
Does all grout need sealing?
Cement-based grout (sanded and unsanded) always benefits from sealing. Epoxy grout does not, because it cures as a solid non-porous resin. If you are unsure what type of grout is in your bathroom, the easiest test is the water drop: place a few drops on a grout line and watch. If it absorbs within 30 seconds, you have cement grout that needs sealing.
How long does grout sealer last?
Penetrating sealers typically last 1 to 3 years depending on location and cleaning products used. Showers need more frequent reapplication than floors. Harsh cleaners, especially anything with bleach or high pH, degrade sealers faster. The water bead test gives a more accurate answer than any time estimate.
Can I seal grout right after laying new tile?
Not immediately. New cement-based grout needs time to cure before sealing. The minimum is usually 48 to 72 hours, and some manufacturers specify 7 days. Sealing too early can trap moisture inside the joint and interfere with the curing process, which weakens the grout itself.
How do I know if my grout sealer is still working?
The water bead test. Sprinkle a small amount of water on the grout and watch what happens over 30 seconds. If the water beads on the surface without soaking in, the sealer is intact. If the water darkens the grout as it absorbs, the sealer has worn down and it is time to reapply.
Can I seal grout on colored tile without changing the look?
A penetrating sealer will not affect the color or sheen of either the grout or the tile surface. It fills the pores below the surface without leaving a visible coating. Topical sealers, especially those marketed as "color-enhancing," will darken the grout slightly and may add a sheen. Always check the sealer label and test on a small area if appearance is a concern.