Bathroom Design
Bathroom Lighting Ideas That Actually Flatter the Room
Practical bathroom lighting ideas covering vanity sconces, ambient layers, shower-rated fixtures, and color temps that flatter both your face and the room.

Good bathroom lighting does two jobs: it makes the room look its best and it makes you look your best. Most bathrooms fail at both because they rely on a single overhead fixture, the lighting equivalent of one-size-fits-none. Layer it properly and the difference is immediate.
At a Glance
- Light the face from the sides, not from above. Sconces flanking the mirror beat a single bar light mounted on top of it.
- Stay in the 2700K-3000K range for every fixture in the room. Mixing color temperatures across layers is the single most common mistake.
- Look for a CRI of 90 or higher at the vanity; the Department of Energy notes that a minimum CRI of 80 is standard for interior lighting, with 90-plus reserved for spaces where color accuracy actually matters.
- Anything installed inside the shower enclosure or directly above a tub must carry a UL wet-location rating, not just a damp rating.
- A three-circuit setup (vanity, ambient, accent), each on its own dimmer, gives the most control for the least added wiring.
- New circuits, moved fixtures, or anything inside the wet zone typically need a permit and a licensed electrician, and GFCI protection is required on bathroom circuits under the National Electrical Code.
Start With the Vanity: The Layer That Matters Most
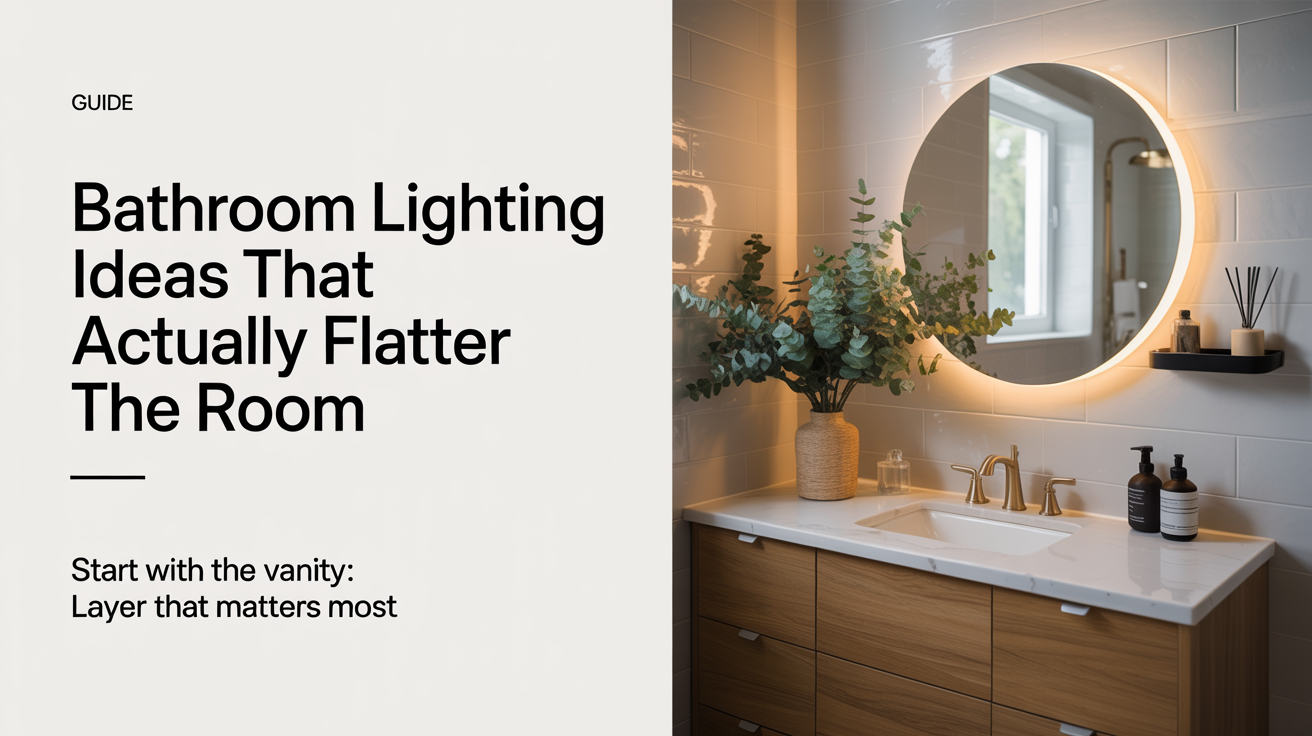
The mirror zone is where bathroom lighting earns its keep. The classic mistake is mounting a single bar light above the mirror. Overhead light throws shadows straight down your face, accentuating under-eye circles and nose shadows in the worst possible way.
Side-Mount Sconces Instead
The best lighting for bathroom mirror tasks comes from sconces placed on both sides of the mirror, not above it. Side-mounted fixtures cast light across the face evenly, the same principle Hollywood makeup studios have used for decades.
Mounting height: Center the sconce at roughly 60 inches from the floor, eye-level for the average adult. If your mirror is narrow and side-mounting isn't practical, a horizontal bar directly above the mirror is the next-best option. Keep it at least 75 to 78 inches from the floor to avoid glare in your eyes when standing.
Color Temperature and CRI for Vanity Lighting
Specification matters here more than style. Choose:
- Color temperature: 2700K-3000K. This warm-to-neutral range reproduces natural daylight without the cold blue cast that makes skin look washed out. 4000K and above is too clinical for a bathroom mirror.
- CRI of 90 or higher. CRI (Color Rendering Index) measures how accurately a light source renders color. The Department of Energy treats CRI 80 as the floor for acceptable interior lighting and flags 90-plus as excellent color fidelity, which is the range worth paying for at a mirror where skin tone and makeup color actually need to read true. A CRI below 80 is why your outfit looks different at home than in the store.
- Output: 1600-2000 lumens total at the vanity zone is a reasonable starting point for a standard 36-48 inch vanity. Larger vanities or dark tile surrounds may need more.
Look for fixtures rated for damp locations (UL damp-listed) if the vanity is within 6 feet of a tub or shower. The NEC doesn't require a wet rating at the mirror itself, but damp-rated is the right call for any humid bathroom.
Ambient Light: The Layer Everyone Underestimates
Ambient light fills the room so you're not fumbling in shadow zones between the vanity and the door. In a bathroom, this usually comes from a central ceiling fixture, recessed cans, or a combination. In a compact space, it helps to think through these fixture zones while laying out a small bathroom, since where the toilet, vanity, and shower land shapes where ceiling lights can actually go.
A single 60-watt-equivalent ceiling fixture in a 50-70 square foot bathroom will feel dim and flat. A better approach: two to four recessed cans (4-inch aperture works well in lower ceilings) on a dimmer circuit, matched to the same 2700-3000K range as your vanity fixtures. Mixing color temperatures across layers makes a room feel unsettled in a way that's hard to name but immediately noticeable.
Lumens for ambient: Target roughly 70-80 lumens per square foot for a bathroom used for getting ready. A 60-square-foot bathroom needs approximately 4,200-4,800 lumens ambient if you're relying on it without supplemental task lighting. With proper vanity lighting layered in, you can back that number off significantly.
If you're rethinking the whole layout, it's worth coordinating lighting placement with the broader bathroom layout plan so fixture locations make sense structurally before anyone cuts drywall.
Shower and Wet Zone Fixtures: Where Ratings Actually Matter
The shower is the one place where the wrong bathroom light fixture is a genuine safety issue. Water and electricity require respect.
Damp vs. Wet Ratings
| Rating | What It Means | Use In |
|---|---|---|
| Dry location | No moisture protection | Hallways, bedrooms, not bathrooms |
| Damp location (UL damp) | Handles humidity and indirect splash | Vanity areas, bathroom ceiling outside shower zone |
| Wet location (UL wet) | Direct water contact rated | Inside the shower enclosure, above tub |
Any recessed can or fixture installed inside a shower enclosure or directly above a tub-shower must be UL wet-rated. "Shower-proof" marketing copy is not a substitute for the actual UL listing. Check the spec sheet, not the box art.
Shower fixtures are almost always low-profile recessed trims, a surface-mount pendant inside a shower would be both impractical and code-violating in most jurisdictions. For the ceiling above the shower, a 4-inch or 6-inch airtight, wet-rated recessed trim with an LED module in the 2700-3000K range is the standard solution.
Electrical note: Adding a new circuit or moving fixtures in the wet zone typically requires a permit and a licensed electrician. Local codes vary, but the NEC zones around tubs and showers are specific, and the same code requires ground-fault circuit interrupter (GFCI) protection on bathroom receptacle circuits. The National Fire Protection Association notes that GFCI protection has cut electrocutions in the products and locations it covers by roughly 95 percent since it became a standard code requirement, which is the entire reason inspectors are strict about wet-zone wiring. This is not a project to finesse without a permit.
Accent and Decorative Lighting: The Finishing Layer
Accent lighting in a bathroom isn't mandatory, but when it's done right it transforms the space from functional to finished. It's also what shows up in renovation photos that make a bathroom look twice as expensive as it was.
Common applications:
- Toe-kick or under-vanity LED strip: Low-voltage, low-profile, and especially useful for nighttime bathroom trips where you don't want to blast the overhead lights on. Use a warm 2700K strip rated for damp locations. Stick-on LED strips with a simple timer or motion sensor work here without major wiring.
- Niche lighting in the shower: A small wet-rated LED puck or strip light inside a shampoo niche creates depth and makes the tile work worth looking at. This only reads well if the niche tile is interesting, a plain builder-grade ceramic niche lit from within mostly illuminates the ordinary.
- Backlit mirrors: Factory-backlit mirrors (the LED ring around the perimeter behind the glass) have improved substantially. Many now include built-in dimmers and color temperature adjustment. If you're already considering a new mirror, a backlit option can consolidate the "vanity lighting" layer into the mirror itself, freeing up wall space.
The right accent layer depends on the overall direction of the room. If you're working through a tile palette or color scheme, the lighting should reinforce those choices rather than fight them, something worth thinking through alongside your bathroom color scheme.
Dimmers and Switches: Small Decisions With Big Impact
A bathroom used for quick morning routines needs different light than a bathroom used for a slow evening soak. Dimmers solve both without installing separate fixtures.
Not all LED fixtures are dimmable, and not all dimmers are compatible with all LEDs. Before buying either, check:
- The fixture's spec sheet confirms "dimmable."
- The dimmer is listed as compatible with that LED driver. Mismatched dimmers cause flickering and buzzing that's maddening to diagnose after the fact.
- If you're adding a new switch leg or dimmer circuit in a bathroom, local code may require a GFCI-protected circuit, check before roughing in.
A three-circuit setup (vanity, ambient, accent) with separate dimmers gives you precise control. A two-circuit setup (vanity + everything else) is the practical minimum.
Switch and dimmer placement matters too, not just for convenience but for anyone using the room. Federal accessibility guidance for operable controls, which includes light switches and dimmers, puts the usable reach range between 15 and 48 inches above the floor for a standard forward or side approach. Even in a home that doesn't need to meet that standard formally, keeping switches inside that band is a sensible default. It works for kids, for anyone carrying towels or laundry with both hands, and for aging in place without a remodel later.
Frequently Asked Questions
How high should vanity lights be mounted?
For side-mounted sconces, the center of the fixture should sit at approximately 60 inches from the floor, near eye level. For an above-mirror bar light, mount it 75-78 inches from the floor to keep the light source above your line of sight and reduce glare.
What color temperature is best for bathroom lighting?
The 2700K-3000K range is the most flattering and versatile for bathrooms. It's warm enough to render skin tones accurately without the yellow cast of older incandescent bulbs. Stay away from fixtures above 3500K at the vanity, they make the space feel clinical and can distort color when you're getting dressed.
Do I need a wet-rated fixture inside the shower?
Yes. Any fixture installed inside the shower enclosure or directly above a tub must carry a UL wet-location listing. A damp-rated fixture is sufficient for the rest of the bathroom ceiling and vanity zone, but inside the shower, wet-rated is the code-correct and safe choice. Installing the wrong rating can also void homeowner's insurance claims related to water damage.
Can I update bathroom lighting without rewiring?
Sometimes. Swapping a fixture on an existing circuit, same location, similar wattage, is often a straightforward DIY swap if you're comfortable with basic wiring. Adding new circuits, moving fixture locations, or working inside the shower wet zone usually requires a permit and licensed electrician. When in doubt, pull the permit: it protects the work and the home's resale value.
How many lumens does a bathroom need?
It depends on how the space is used and how layers are combined. A rough target for task-heavy bathrooms (getting ready, applying makeup) is 70-80 lumens per square foot. A 60-square-foot bathroom doing heavy task work needs approximately 4,200-4,800 lumens distributed across layers. If you have strong vanity lighting, you can run the ambient layer lower. A dimmer-controlled setup lets you dial in exactly what the moment calls for.
Why do my LED bathroom lights flicker when dimmed?
Almost always a dimmer-driver mismatch. Standard incandescent dimmers cut power in a way many LED drivers can't handle smoothly, which shows up as flicker, buzzing, or a light that won't dim all the way down. The fix is swapping in a dimmer specifically listed as LED-compatible, and ideally one tested with the exact fixture or driver model. If flickering starts only after months of normal use rather than from day one, that's more often a failing driver than a dimmer problem, and the fixture itself may need replacing.
Is it worth paying more for a higher CRI bulb?
For general hallway or closet lighting, not really. For the bathroom vanity, yes. A CRI in the 90s at the mirror is the difference between makeup, skin tone, and clothing colors reading accurately versus looking slightly off in a way that's hard to pin down until you step outside. The price gap between a CRI 80 and CRI 90+ LED bulb of the same brightness is usually a few dollars, which is a small cost for a fixture you'll look into every morning.
The Tiled Bath is an independent home-improvement resource. We are not affiliated with, sponsored by, or endorsed by any brand, manufacturer, or retailer mentioned in our guides. Electrical work in bathrooms is subject to local codes, consult a licensed electrician and pull the required permits before modifying circuits or adding fixtures in wet zones.